Introduction: (Please read at least once ) - Jump to Table of Contents) Why 360? 2014 heralds in the 25th year since the inception of Pscale. Starting as a MS-DOS program in 1989, it was ported to Windows 3.1 around 1996. During 2009, it became apparent that Windows 7 would finally kill Pscale because it would no longer support Windows 16 bit program code. At this time, we developed a work around using the Open Source DosBox platform resulting in the PscaleX Cross Platform solution. We believe that the PscaleX platform will continue to run in all future versions of Windows. However, the irony here is that Pscale for Win under PscaleX requires running a version of Windows 3.1, under DosBox. So, here we are, running Pscale for Win on Windows 3.1 (1995) under DosBox within a 2012 Windows 7 Operating System. This, in itself is coming around in a full circle. It turned out that PscaleX also runs on all Apple computers with Intel chipsets. However, PscaleX still required shipping a "Demo" version of Pscale for Win that included Windows 3.1 ."Ahhh, I'm sorry Judge, but my 400+ registered users were orphaned by Windows 64 bit. What was I to do? I could not, in good faith, just leave them stranded". The prevailing thoughts have been that we were NOT going to rewrite Pscale for 2014 and forward Operating Systems. However, in the the words of LaRoy Edwards "Sometimes we do things just because we can". To that end, we have, in fact, rewritten Pscale for today, and future Operating Systems, Pscale 360 is written in Javascript and html and should run in any modern Internet Browser. With, or without, an internet connection. This means: Desktops, Tablets, Smartphones, under any Operating System, and anything else that will come likely come down the pipeline. Unfortunately, we had to pay $1200.00 in Graphics Library License fees in order to be able to distribute Pscale 360 to everyone in a distribution that does not require an internet connection to run the program once installed. So, we hope you will continue with your support for this new version. Finally, this help file will attempt to mitigate between long time Pscale users and new users. Please bear with any redundancy provided for the newcomers. Disclaimer: The author, Tremaine Parsons, and Sierra Software Services, has taken due care in the preparation of this document and the associated programs. In no event will Tremaine Parsons, or Sierra Software Services, be liable for damages of any kind, incidental or consequential, in regard to or arising out of the use, performance, or form of this material presented herein and in the programs accompanying this document. No representation is made regarding the suitability of this product for any particular purpose. Pscale 360 License: The price paid Pscale360 entitles you to use the program on any computer or computer device that you own, but at no time are you allowed to make multiple copies available for others to use unless they are within your employ and agree to discontinue use after employment ends. Pscale360 is written in Javascript and Sierra Software and Tremaine Parsons request that you not decompile, or reverse engineer, the Pscale 360 portion of the Pscale Javascript code. Furthermore, Pscale 360 includes a Javascript Graphing Library written by Antanas Marcelionis of Lithuania and released as "amCharts" from which Sierra Software Services and Tremaine Parsons purchased a distribution license that allows us to redistribute the library to purchasers of Pscale 360. We ask that you honor our Pscale360 license, as well as the amCharts which includes, but is not limited to, wording as follows: 5. PROPRIETARY RIGHTS: All intellectual property rights in the Software are owned by amCharts or its suppliers, as applicable, and are protected by law, including but not limited to Lithuanian copyright, trade secret, and trademark law, as well as other applicable laws and international treaty provisions. The structure, organization and code of the Software are valuable trade secrets and confidential information of amCharts and its suppliers. You shall not remove any product identification, copyright notices or proprietary restrictions from the Software. 6. LICENSE RESTRICTIONS You agree that you may not and shall not and that if applicable, the Employer may not and shall not (a) modify or create derivative works based upon the Software; (b) decompile, disassemble, or reverse engineer the Software in whole or in part; (c) defeat, disable, or circumvent any protection mechanism related to the Software; (d) use the Software or any parts of it to develop a product directly competing with the Software. The entire amCharts distribution license is located at: http://shop.amcharts.com/licenses/javascript-charts/20130924/oem/ Interesting Note: I can't find the story, but Antanas Marcelionis of amCharts started around +-2002 by figuring out how to make a Pie Chart in Javascript. As of 2013, amCharts customers have included Microsoft, Cisco, NASA, Motorola, Proctor and Gamble, Bank of America, NBC Universal, Morningstar, and many more. Again, please respect our software licenses.
With Our Thanks To....: (return to TOC) First, throughout this help manual we speak as a collective: We think this is.. or We did this because... The primary reason we do this is because Pscale would never have happened without the help of the following people and we consider them all to be part of the Pscale project whether they wish to be, or not. So, our sincere thanks to: The late Dr. Albert Sanderson for his string formulae, Dave Roberts for The Calculating Technician, Eric Joslyn for writing the Atari Piano String Scale program, David Betts at NBSS for early error trapping at the cost of the third bridge bass strings on a M&H AA (Elongation not subtracted from the trichord tails with long backstring lengths), Ted Sambell, Walter and John Schienke of JD Grandt Bass Strings, Stephen Powell Bass Strings of New Zealand, Frank Emerson, Bruce Clark, Bernhard Stopper, Nate Foss, Mark Gallant, the late Jim Hayes, and all Pscale Users who have provided valuable feedback since 1990. Also, mention should go to: Klaus Fenner, Lothar Thomma, John Travis, Franklin Miller, William Braid White, and many others that we may have missed. We are sure that we have missed some that should be included above, but all have our sincere gratitude. Which Browser should be used: (return to TOC) Pscale360 was developed mostly using the Firefox Browser Version 24 in 2013/14 and then tested on various versions of Chrome, Safari, and Opera on Macs and Win XP, 7, 8, and 10. The main computer used for development was a 10 old CPU with Windows XP Service Pack 3. Currently (2021), the following Browsers work fine on desktop and laptop computers: Firefox, Chrome, Opera, Safari, and Brave. We managed to get Edge in Win 10 to work but seem to recall that it is stubborn with loading files. Our personal preference is Firefox or Chrome. Firefox has a great screen grab feature for copying and then printing graphs from whatever image program you have. Tablets and Smartphones: Android devices should have Android version 4.0 or higher though I did manage to get Pscale360 running on a Galaxy Tab2 version 2.2 with the Opera Light Browser. Iphones or Ipads should have IOS 4 or above. We have not tested older IOS versions. Newer browsers have more Popup window blocking. Pscale 360 creates windows within the program and you will have to tell your browser to Allow Popup Windows for this web page. Note: It's a web page on your local computer. Program Installation: (return to TOC) Pscale 360 can be run from the internet but we encourage all users to download the distributions and burn them to a CD for backup. It is also recommended that you install Pscale "locally" on your desktop or laptop computer. Pscale is comprised of one folder named pscale360 which contains .html, .jpg, .js (text file), .psf (pscale setup file is a text file) and .txt files. If you work locally on your computer you can save your scale.txt files in the same folder. You can also just copy this folder to a USB drive or CD to move to a different computer. The default install folder name is pscale360 If you have a username and password you can access everything from the following link: http://www.goptools.com/360/download You can run Pscale 360 from here but more importantly access the program distributions for Windows or Mac Systems. Once Pscale 360 is installed on your desktop of laptop, you can transfer the folder to tablet devices. Set your Browser to "Ask me where to save downloads" in the browser options or settings. The pscale360.exe Windows intall file: This is a self installing version of Pscale 360 that creates a desktop Pscale 360 Icon. It uses a perfectly safe utility named nircmd.exe to actually create the desktop icon. However, some antivirus programs will flag this as malicious because the bad guys and gals have used the filename elsewhere to mask a malicious program. Our supplied nircmd.exe is absolutely safe and the real deal. Installing from the pscale360.zip file: If you are running a non Windows system/device or your Windows antivirus is giving you trouble, just create a folder wherever you want and unzip the Pscale 360 files to that folder. In this case you will have to manually create a desktop start icon for Pscale 360. The starting file is 360.html for the Decimal Version and 360m.html for the Metric version. You can also use pscale360.html or pscale360m.html If you create a desktop shortcut it will likely default to an icon of whatever browser you are using. However, you can edit the icon properties and select the Pscale icon. For Windows, the filename is pscale.ico For Macs, the filename is pscale.icns Adjusting Browser View/Display (return to TOC) Most browsers allow for adjusting the View (or size of the page content). Most of the time Pscale 360 will display properly. The correct view is one where the 2nd line at the top of the page is one single line. An incorrect view would display the + buttons wrapped onto a 2nd line. This can be corrected by using the zoom settings so that lines that contain buttons are displayed as a single line (or row). The default command to Zoom In on most Browsers is Ctrl+ To Zoom Out, Ctrl- Getting Started with Pscale 360: (return to TOC) It is best to familiarize yourself with Pscale 360 using your desktop computer for the following reasons: Almost all Column Headings and Table Buttons have browser "Tool Tips". When you hover your mouse over a label or button, the tool tip gives an explanation of the heading or the function of the particular button. It will be easier to get comfortable with the new interface and basic functions using a desktop or laptop computer before you move to a tablet or smartphone. Also, many Desktop Browsers allow allow for "Save as" and "Open" which makes file handling easier (see below).
You can move to any desired note by clicking any of the plotted graph
dots. The Sample Scale Files: (return to TOC) Pscale 360 comes with over 80 sample scales. Some of the file names are fairly understandable while others are a bit more mysterious as to what piano the scale is representing, Files that end in the letter o (original) can be considered more or less an original, as manufactured, scale. This is not to say that it might not contain an errant speaking length or two or perhaps an incorrect diameter or two. Files that end in rs (rescaled) have been rescaled to some degree. Files with multiple versions or numbers are probably rescaling variations. Also, keep in mind that current manufacturers may have improved their bass strings or speaking lengths since the original date of manufacture for any particular model of piano. Usually we can spot a data entry error as there will be an inharmonicity dot or two that are oddly out of position or there will be an obvious outlier in the speaking length graph. Loading and Saving Pscale 360 Graphs/Files: (return to TOC) Please practice loading and saving files before you start entering any scale data. You will save the frustration of spending time entering data and then getting stuck trying to understand saving the file. Depreciated [ ] [ When work on Pscale 360 was started in 2013, initially, the only way so load and save scale data was through copy and paste functions. At about the same time, the HTML5 specification was opening up and Javascript was allowed access to opening and saving local files on a local computer. As of Oct 2021, the bottom line is that all tablets and smartphones will probably still require copy and paste for file handling and almost all notebooks and desktop computers can use the HTML5 file open and save functions. This is why both procedures are discussed in this help manual. Note: It has been commented by a few Legacy Pscale users that this is one of the more confusing aspects of the Pscale 360 upgrade. This is mostly because there are really two methods of opening and saving files; Copy, Paste, and Load/Save using the new HTML5 File Handling Specification. If you plan to use Pscale 360 on a desktop system with a recent version of FireFox, Chrome, or Safari Browsers (IE and Edge not so much as of this writing) then you can skip the Copy and Paste method and proceed to the Some Desktop Systems can use the new HTML5 File Handling API below. For Tablets and other handheld devices you may want to understand the Copy and Paste concepts. ] Update: Most Desktop/Notebook Systems and Mobile Devices can now use the new HTML5 File Handling API (explained below) Note: Pscale 360 does not yet completely support Bichord Plain Wire Pianos. Just enter as TYPE TP (Trichord Plain) and Calculate 2/3 of the total plain wire tension. Depreciated [ ] [ To get around javascripts file read/write security restrictions, Pscale 360 was originally designed to Load Scale Data using the Select All, Copy, and Paste functions common to all computers and devices. Ctrl A (select All), Ctrl C (Copy), and Ctrl V (Paste) (or Cmd A, Cmd C, and Cmd V key on Macs). Pscale 360 files are saved as plain text files and loaded from plain text files. But, they have to be copied and pasted to load a previously saved file. Both Windows and Mac Browsers allow the user to open local files using the File, File Open option. To start Pscale 360, one would locate and open 360.html You can open a scale.txt data file the same way for copying and pasting to load the file. Most Windows Desktop Browsers allow one to "File, Save as" type .txt files as well as "File, Open" to open a scale file. Mac Users will need to know how to access their text editors and save .txt files. It would be helpful to make a copy of the TextEdit.app icon (in the applications folder) and move it to the desktop to have it handy. The TextEdit app may default to saving to files of type RTF with and HTML option. You can save your scale files as type html or go into Text Edit Preferences and set it up to handle text files by default. As you are saving files to be copied and pasted back into Pscale 360, the files can likely be saved in any format. On Tablets and Smartphones, if you paste scale data into an email or memo and then you can re-fetch the data with your Tablet or Smart phone Saving on Desktop Computers: The fastest way to Select All, Copy, and Paste is to use Ctrl A, Ctrl C, and Ctrl V key combinations respectively. On the Mac keyboard you would use Cmd A, Cmd C, and Cmd V key combinations. You can also pull down the Edit Menu and use the Select All, Copy and Paste options. On many Browsers you can also pull down File and use Save As and change the file to type .txt Saving on Tablets and Smartphones: Select All, Copy, and Paste functions on these devices are a little device specific but generally, you touch and hold the text and the options pop up for your selection. Note: Apple Ipads and Iphones are rather restrictive regarding their file systems so you will have to paste into an email and send to yourself or paste into a "Notes/Memo" file. One can also use an App like iFile. Note: When loading a different scale file, it is necessary to Select All and Delete the data currently in the Paste Scale Data input box before pasting in the new scale data. ] The Library Button This feature is "depreciated" in that file open and save options are now fairly standard. However, tablets and phones still require copy and paste to load and save files and thus, not recommended for regular work. The Library Button loads a page listing all the sample scale files that come with Pscale 360. Any scale file that you save will not appear on this list. As there are many files, users might find it helpful to name their files starting with an _ (underscore) . An example would be: _myfile.txt Or, use 0myfile.txt (zero) If you name your scale files this way, they will always appear at the top of the list when using your browsers File, Open command. Most Desktop/Laptop Systems can use the new HTML5 File Handling API Note: Pscale 360 Version 1.0 anomaly: If you can use the Browse or Choose File Button to select different scale.txt files you cannot then use the Library Button and Copy and Paste a new scale file into the Paste Scale Data field. You must reload (refresh) the page before you can use the Library button with Copy and Paste. If you want to review the Library sample scales that have descriptions it is best to just use the Copy and Paste method. Also, new HTML5 File Handling API only applies to files that you load and save from your "local" computer. If working Pscale 360 online, this feature will only access files on the users "local" computer. The new HTML 5 Specification contains some File Handling which makes it easier to load and save Pscale 360 scale files. While partially supported on tablets, Pscale 360 limits its use to Desktop browsers (non mobile devices). This has been tested and verified to work using recent versions of Firefox, Chrome, and Safari browsers on both Windows and Apple desktop systems.
If the users desktop browser supports HTML 5, there will be an additional
line of options at the top of the main page "Middle Menu". (Note: Browse
Button may be named Choose File)
When ready to save a work session, the user clicks the left side Save
button (as per the copy and paste method) and this will preload the File
Name and Data boxes on the top right side. The user can modify the filename
and click the Save5 button to save the file. The left hand Save button also
opens another window with scale data (to use copy and Paste) which the user
can just close. By default, Windows systems place the saved (downloaded) file in My Documents/Downloads and Apple systems place the saved (downloaded) file in Documents. However, Firefox, Tools, Options, General allows the user to select "Ask me where to save downloaded files". Chrome, Settings, Advanced Settings allows for the same option. It is recommended that you set your Browser to: "Ask me where to save downloaded files". Finally, it should be mentioned that Browsers and HTML 5 consider a saved file to be "downloaded" but it is actually data saved from memory space onto the users computer. Likewise, Browsers and HTML 5 consider loading a file from the computer as "uploading" when in fact the Pscale user will be opening a text file from the users computer. If the user was running Pscale 360 from an internet URL then they would be uploading and downloading. However, our preference is to run Pscale 360 directly from our hard drive or USB drive and thus not need an internet connection. Starting a New Scale (return to TOC) Note TYPE should always be set first when starting a new scale. Pscale has always required that each note (88 - 1) be given a Note TYPE.
TP (TriChord Plain) When starting a new scale, one should start by using the [..] (Global Batch option to set them all in one step) option from the TYPE pull down menu at the top left of the main graph. This option will ask for # of Unichords, Bichords, and Trichords of the above listed types and pre-populate the Note TYPE in the Grid spreadsheet lower portion of the Pscale 360 main page. The Grid spreadsheet is the fastest way to bulk enter existing scale data. You may now also use the the TYPE link at the top of the grid data entry. Same as the [...] option. Note: as of Version 1.9 American Decimal and 1.6 Metric an ENDS (exposed core) value for bass notes is set to 18 for convenience. You can reset this to that of your original scale is using the [...] option in the ENDS pulldown menu. Note: Any Text input box changes will not stick until you press the Tab key to advance out of the input box. In the lower Grid section, entry or changes require the Tab key or Down Arrow for data to be retained/changed. (Up Arrow also works) For the most part, Data Entry is fairly self explanatory. However, in Pscale360, there are two basic methods for data Entry: Note by Note or Grid Entry. On Desktop Computers, "hovering" over any column label will provide a description of the label. With Note by Note, one just selects the data entry values via the 2nd to top row data fields with "Pull Down", Select, and Choose Menus. Or, enter data in a blank data input field if no "Pull Down" option is available. The user just works their way downward note by note. However note by note data should be entered in the order of left to right: Note # ,TYPE ,SPLM ,DIAM, and if Bass Notes ODWRAP and ENDS In this case, the graph should auto-update with each data selection or entry change. (The Calc Button is there as a fail safe to Force Calc) With Grid Entry, one can just shoot down the necessary columns entering appropriate data as you go. (see caveat below) Note: it is faster to use the [..] batch entry command on Note TYPE, and ENDS fields of the top Menu Bar (explained in Data Entry Fields below). The DIAM Field in the Top Menu also has a [...] batch entry option but the Grid/Spreadsheet form has an even better batch entry command for DIAM (explained below). Then do the rest of the data entry in Grid/Spreadsheet mode. The Top Menu and Grid/Spreadsheet Entry methods are linked so that any entry from the top Menu is updated in realtime to the Grid/Spreadsheet data entry table. Likewise, the Grid/Spreadsheet data entry table is linked to the scale data internal data in memory and updated in real time with the exception of the following caveat: Caveat: When entering data in Grid/Spreadsheet mode, the scale data data is updated in memory but we decided not to dedicate processor time for graph redraws while entering data in Grid/Spreadsheet mode because we will just be stepping down through the scale data entering numbers as fast as we can reliably can. For this reason, it is necessary to click the "ReCalc" Button or press F9 to update the graph after any Grid/Spreadsheet data entry changes. The Grid Entry tool is also an excellent way to view of your scale data for error checking. As a general rule, users will enter a new scale data from measurements recorded using Grid Entry as it is faster. Once the data is entered, we would click the ReCalc Button to refresh the graph. We would then "Autoscale" the Bass. Finally, we would step note to note using the "Top Menu" to "tweak" and refine our scale using the + and - Buttons to a finished state. Remember to save the file at any point in the above process. Data Entry Fields: (return to TOC)
The Top Menu Data Entry fields are as follows: Caveat: As of Version 1.9 Decimal and 1.6 Metric, we have also added the Ctrl keys to step down a note and the Shift key to step up a note. [ and ] keys will also step down and up a mote. These keys will be used most while editing the main graph using the top + and - buttons and perhaps the pulldown menus. As explained below, extra care must be given to the arrow keys with regard to the top menu pulldown menus. Don't use them. Update: The Ctrl (move down a note) and Shift (move up a note) key actions have been enhanced like the F1 and F2 keys by default. However, both of these can be enabled/disabled in the Pscale Setup file. BTW, the [ and ] keys also step down and up a note. Also, The F9 Key will now do a ReCalc. Note # is obvious and you step down or up using the - or + buttons, "Pull Down" to Jump to Note # TYPE is Note Type: TP (TriChord Plain), BS (Bichord Singlewound), US (UniChord Singlewound), UD (UniChord Doublewound), TS (TriChord Singlewound), and [..] (Global Batch to set them all in one step). [..] allows one to set TYPE for all notes of the scale in one step. SPLM is Speaking Length in mm. It is an input box in case you want to go to resolution of .5 mm. The - and + buttons will automatically step the value down or up in 1 mm. increments. This would be the shortest speaking length in dual/tri speaking length bass notes where the bridge is not notched and beveled in a straight manner..
DIAM is the plain or core wire diameter (American Decimal in 360.html
, Metric in 360m.html). The [...] option in DIAM allows one to set DIAM down for # of notes in one step. ODWRAP is the Outside Diameter of a wrapped Bass String. The - and + buttons will automatically step the value down or up by increments of .001 in the decimal version and .01 in the metric version. ENDS is the Exposed core at each end of a wound Bass String. For simplicity here, we are only tracking one value as these values should be the same at each end of a balanced string. [Even if we had 10mm on one end and 20mm on the other, the Inharmonicity would calculate the same as if we had 15mm at each end. Therefore, we only need to track one value. The [...] option allows one to set all ENDS for a range of notes in one step. As of Pscale 360 American Decimal version 1.9 and Metric version 1.6, the Ends field now has a - and + Button on each side to decrement and increment the ENDS value by 1 mm. Long exposed cores (ENDS) are one of the biggest factors in High Inharmonicity in bass strings. And, often we will increase this length in low tenor bass strings to raise Inharmonicity a bit to even things out. ATSD is the length of the Agraffe to Strike Distance in mm. This is used to calculate Hammer Contact Time as explained in "The Calculating Technician" by Dave Roberts. The sample file steingdo.txt has some ATSD numbers at the trichord bass to plain wire changeover. The Grid/Spreadsheet Data Entry form: (return to TOC) Note: As of Pscale360 1.9 American Decimal and 1.6 Metric, users can quickly wipe out any Grid field using the Esc Key. A long time Pscale user was lamenting that he could no longer just type over existing numbers. Well, Browsers do not do type over so using the Esc key is the next best option.
If the note TYPE column has not already been pre-filled there are two
ways to do this: 1] Click the TYPE link at the top of the column and specify the number and types of bass notes. Make sure to follow the pattern within the data entry box. 2] Use the TYPE pull down menu at the top of the graph, click the [...] option, and specify the number and types of bass notes. Make sure to follow the pattern within the data entry box. As of Version 1.9 Decimal and 1.6 Metric, when you prefill the TYPE column it automatically inserts a value of 18 mm. in the ENDS column as a convenience. You can reset ENDS using the top ENDS pulldown menu with the [...] option to reflect the original scale as necessary. SPLM is entered as mm. but if you happen to have decimal inch measurements, you can enter a decimal inch measurement preceeded with a / in the grid. So, /2.1 (inches) will be converted to 53 mm. Grid input only. Entering data in this form always requires that one uses the Tab key or Down Arrow (V 1.7 American Decimal or V 1.5 Metric) to advance to the next field, or pressing the Enter key, to make sure that any entered value is saved. The Up Arrow will return to the previous field above. A note about using the Down (or Up Arrow) within the grid entry: This is a great addition in that one can set the Num Lock key, enter a data value, and hit the Down Arrow to advance to the next field. This will make data entry faster. Exception, If using the * for alternate BPHP1 tail data entry, the * should always be followed by hitting the Enter key. More on this in the Alternate Method of Entering Bass Note Measurements section. However, the Down or Up Arrow will also affect any of the top pulldown menus if they happen to have focus. This would be the NOTE #, TYPE, DIAM, ODWRAP, and ENDS pulldown menus. This might be helpful when you want it to be, but not so if one of these pulldowns accidentally gets focus. Actually, standard browser behavior lets the arrow keys change pulldown menu values and we really don't want this due to accidental value changes when we want the + or - buttons to do this, or the pulldowns to change values. We have managed to disable this behavior but have only succeeded to limit the arrow keys to making only one change if a pulldown menu has focus and the arrow keys are accidentally pressed. And, this will only happen if the pull down menu selects, or leaves, the same value. You can make sure pulldowns do not have focus by clicking to the left or right of the graphs. (on the page) Examples: Example 1: If you have loaded a scale and are looking at the main graph: If you pull down the Note # dropdown menu and select a note (can be same note), or click outside of the dropdown. This dropdown menu now has focus. In this case, the Down Arrow will step down a note and the Up Arrow will step up a note. Convenient to know but disabled beyond on change. As of Version 1.9 Decimal and 1.6 Metric, we have also added keys to step down a note or up a note. The Ctrl Key will step down a note and the Shift key will step up a note, Also the [ key will step down a note and the ] key will step up a note. Update: The Ctrl and Shift key actions have been enhanced with the F1 and F2 keys by default. However, both of these can be enabled/disabled in the Pscale Setup file. BTW, the [ and ] keys also step down and up a note. Also, The F9 Key will now do a ReCalc. These keys will be convenient to use while editing the main graph using the top + and - buttons and perhaps the pulldown menus. Therefore, the next two examples may no longer apply. When any of the top pulldown menus had focus, the left, right, up, and down arrow keys would change data values after pulling down the menu and selecting the same existing value. On the whole, users should be aware of html forms and focus. When clicked in a text box or selecting a pulldown menu item then they have "focus" and the PgUp and PgDn do not work to move up and down the page. Click in any white space on the page and the entire page has focus and PgUp and PgDn work as expected. Example 2: If you have loaded a scale and are looking at the main graph: If you pull down the TYPE dropdown menu and select the same note TYPE, or click outside of the dropdown. This dropdown menu now has focus. In this case, the Down Arrow will change the Note TYPE to BS. This would be a problem if you were not aware that the TYPE pulldown had focus. Ooooops, A4 just changed to TYPE BS. Example 3: If you have loaded a scale and are looking at the main graph: Suppose we click on a dot for the lowest plain wire and want to convert it to TYPE BS (BiChord Singlewound conversion). You pulldown the TYPE pulldown and change to TYPE BS. In this case Pscale will automatically insert starting values for ODWRAP and ENDS. When we change a low tenor plain wire to a bichord we often end up increasing the exposed core to raise inharmonicity a bit. We have added the + and - buttons to make changing the exposed core values easier. Bottom Line: The Down Arrow and Up Arrow keys were primarily added to make grid data entry easier. However, we must remember that they can alter data within the top pulldown menus if any of them have focus. Rule of Thumb: Do not use the arrow keys when working the top + and - buttons or pulldown menus. Use the Shift and Ctrl, F2 and F1, or ] and [ keys to step up or down notes. The key behaviors can be enabled/disabled in the Pscale 360 Preferences. Update: The Ctrl and Shift key actions have been enhanced with the F1 and F2 keys by default. However, both of these can be enabled/disabled in the Pscale Setup file. BTW, the [ and ] keys also step down and up a note. Also, the F9 Key will now do a ReCalc. Also, remember that any data entry in the grid form will require clicking the Mid Menu ReCalc Button or pressing F9 to refresh the Graph. Finally, remember that your data entered is only in memory so do a save to filename frequently. The Grid/Spreadsheet DIAM batch command: The DIAM column of the Grid form has a batch fill command that is even faster than the Top Menu DIAM [..] option. Starting in the top DIAM field (Note 88) of the Grid form, one can simply enter 31/4 in the field and it will autofill a value of: .031 down for 4 notes and leave the cursor in the next empty field (Note 84). With this command, one can just enter something like the following for a very rapid filling of this column: 31/4 Tab key 32/4 Tab key 33/6 Tab key. This autofills 4 notes @ .031, 4 notes @ .032, and 6 notes @ .033 and so on down the column. The Metric Version 1.5 also has this feature but you must adhere to the number pattern #.###/4
The Grid/Spreadsheet data entry form has the following additional
fields/columns. The following information is needed if one is NOT sending a quality String Rubbing to the String Maker. On Desktop systems, one can "hover" for explanations but a brief explanation follows: BPHP1: Speaking Bridge Pin to Hitchpin in mm. for UniChords, Left String of Bichords, Left String of TriChords. Ref point: Standing at keyboard looking at strings. BPHP1 string will always be closest to note 1. BPHP2: Speaking Bridge Pin to Hitchpin in mm. Right String of Bichords, Center String of TriChords. Ref point: Standing at keyboard looking at strings. BPHP2 string will always be farther from note 1 than BPHP1. BPHP3: Speaking Bridge Pin to Hitchpin in mm. Right String of TriChords. Ref point : Standing at keyboard looking at strings. BPHP3 string will always be farthest from note 1. Clarification: Technically, Speaking Bridge Pin to Hitchpin (BPHP) is measured to the Back of the Hitchpin though some manufacturers state to the Front of the Hitchpin. You will generally be safe measuring to the Front of the Hitchpin as the wire loops are generally larger that the pin and will elongate some over time. One could also measure to the Front of the Hitchpin and add about 2 mm. to split the difference. It would be a good idea to note on the Bass Report Measured to: Front, Middle, or Back of Hitchpin. Many string winders will furnish tape measures designed for hooking to hitch pins.
LSPLM: Longer Speaking Length in mm. for straight bridges with un-notched
Bichords. As Pscale 360 Version 1.8 Decimal and Pscale 360 Version
1.5 Metric, notes of TYPE TS (trichord singlewound) can now handle tri speaking
lengths by placing two values into the LSPLM field in the following format:
947<955 (shorter < longer) There is an included sample fill named: 000tri.txt if you want to look at the data in the grid and the Print Bass results. AWSM: Length of Overwinding Step on UniChord Doublewound in mm. 13mm - 15mm is ideal. If AWSM column is empty the length of AWSM defaults to the lengths in the ENDS column. WRAP: Wrap Constant for specific notes if different than default value. Blank for Copper, I for Iron, A for Aluminum. Note you can also use the Specific Gravity divided by 10 of the wrapping material so you could use something like .79 for iron or 1.9 for Bass String wrapped in pure gold. The program defaults to Copper (Blank). Grid/Spreadsheet Hand Shaking with Main Forms: (return to TOC) As mentioned previously, when you are entering data in the Grid you have to click the ReCalc button or press F9 to see any changes to the graph. We have made every effort to get the main elements of the top form to be in sync with any changes made within the grid and vice versa. However, while any changes made within the grid (as well as in the forms) go directly into program data memory, there are still situations where the top form elements are not immediately updated. For Example: if you click on a note on the graph (say note 20) and then you change a speaking length in the grid, the speaking length field at the top of the form is not updated until you click on that note again or move down a note and then back up a note. Tightening this handshaking is ever ongoing. What is most important is that the data is maintained properly in memory. Dual/Tri Speaking Length Data Entry Clarification: (return to TOC) Dual speaking lengths on straight un-notched bass bridges came shortly after the inception of Pscale so a second column (LSPLM) was added for the longer speaking lengths of Bichords. As of Version 1.8 American and 1.5 Metric a method was devised to accommodate tri speaking length trichord bass notes. Place the middle and longest speaking lengths into the LSPLM column in the format of ###<### (shorter<longer). This is sort of a work around but we did not want to entertain changing the Pscale 360 file structure. What may be confusing to some is that speaking lengths are entered left to right on the grid: shortest (SPLM) on the left side and longer (LSPLM) in the right. Or middle and longest for trichords ###<### in the LSPLM field. However BPHP1, BPHP2, and BPHP3 are entered with the BPHP1 string being closest to note 1, BPHP2 farther, and BPHP3 farthest if a Trichord. The confusion may lay in the fact that the longer speaking length(s) while actually closer to note 1, are entered to the right of SPLM into LSPLM in the grid. In one sense, this is opposite to the BPHP layout. The Bass Printouts take care of sorting these differences out and prints highest string to lowest string. Error Checking - The Error Chk Button: (return to TOC) In Pscale 1.8 American Decimal and 1.5 Metric we added a new method of entering bass string length measurements. This was primarily for techs in the habit of measuring hitch pin to speaking bridge pin (BPHP#) and hitch pin to Agraffe/V Bar / Upper Termination which we call HPtoA. Techs who use this HPtoA method don't really need to think about speaking length while measuring while Pscale has used SPLM (speaking length in mm.) since inception in 1990. Having added this new method of data entry we decided that it would be prudent to add some string length measurement error checking. While we can always have a measurement error, we need to minimize the possibility of any data entry errors. In an ideal world, notched bridges will give you equal speaking lengths in bichords and trichords and Pscale 360 assumes this to be the case. In multi speaking length bichords and trichords the longer lengths within a single note will be closer to note 1. So, the multi speaking length bichords and trichords are error checked to make sure that data is entered correctly in the grid and give warnings if possible length entry errors are detected. However, when using the HPtoA measuring method we anticipate that it may be possible to trigger and error warning if a middle string (BPHP2) on a notched trichord measures a mm shorter than its upper (closer to note 88) neighbor. Or, some minor similar difference with BPHP3 or BPHP1. Therefore, given that the error checking may not be perfect, it will be up to the user to look at the grid and make any corrections if necessary. Furthermore, if you have non parallel notching in a bass note then it may be possible that the speaking length of the string closer to note 1 might indeed be shorter than the adjacent string farther away. If this is the case, the warning may be ignored. The Error Chk Button also checks for Wrap/Core Ratio issues as well as Break % excesses which are described further below.
The Other Buttons and Fields:
(return to TOC) Underneath the Loudness/Sustain graph a new checkbox option has been added: Use Metric Plain/Core Wire DIAM [ ] UP [ ] This option allows users who string with metric wire like Roslau or Paulello to actually see the difference between decimal and metric Tension, Inharmonicity, and Break %. The difference is slight in the overall picture but it is helpful to have this option. The Up [ ] option changes to a 1/2 size higher Euro gauge number where the metric to decimal conversions are rounded down and recalculates Tension, Inharmonicity, and Break % accordingly. Underneath the main Graph(s) there are a number of Buttons and Input fields. Most are self explanatory. On Desktop Computers you can "hover" your mouse over any of these and get an additional explanation of their functions. It is always recommended to start using Pscale 360 on a desktop system to get to know the various functions using the "hover" tool tips. A few items on the Mid Menu require special mention: The ? link next to the <-Load button lists the current open file, any addl. info, and also the keyboard commands. Looking at the graph the Shift key will step up a note and the Ctrl key will step down a note. Within the Grid/Spreadsheet, the up and down arrow keys move up and down a cell and the Esc key will balank out a cell.
Update: The Ctrl (move down a note) and Shift (move up a note) key actions have been enhanced like the F1 and F2 keys by default. However, both of these can be enabled/disabled in the Pscale Setup file. BTW, the [ and ] keys also step down and up a note. Also, The F9 Key will now do a ReCalc. The < > Button is a new Speaking Length Compare utility that will compare the current open scale SPLM with all of your other scale files. The is mostly educational but can be helpful with a mysterious scale file name. Print Bass Button: Different Bass String Makers prefer slightly different sets of measurements if not using a "rubbing". Pscale 360 updates have added more new options to cover different data preferences by different manufacturers. Instructions for these options are within the dialog boxes when printing a Bass Report. Reports can be printed with, or without, tension "Elongation" subtracted. Pscale 360 uses only one exposed core wire length and it is assumed that exposed core will be equal at the bridge and agraffe ends of the bass string. It was brought to our attention that there are some who would like the agraffe end of the windings to be uniform distance from the agraffe with any increases added to the bridge end of the exposed core. This situation usually only arises with low tenor bass notes where we sometimes have gradually increased exposed core length to smooth out (usually raise) inharmonicity. So a dialog has been added to accommodate un-equal exposed cores. Legacy Pscale had a dedicated column for both Bridge and Agraffe ends. Equal or un-equal exposed cores will calculate Ten, INH and Break% the same within one note so they really need only one value. 19mm + 13mm = 32mm This is the same as 16mm + 16mm = 32mm. We have never used this option and favor "balanced" exposed cores. However, there are some who do and claim no negative issues with un-equal exposed core lengths within one bass note. Finally, the values in the ends column should be 1/2 of the total exposed core of the bass string. Adjusting exposed core at the agraffe is done within the Bass String printout. Finally. it should be noted that: As lengths are measured and inputted in mm, a Bass Report in mm output will be ever so slightly more accurate than a Report that is outputted in decimal lengths due to conversion and rounding to 2 decimal places. Pscale 360 now 5 Bass reports:
2 in Metric lengths with, and without elongation subtracted The Piano/Info/Notes text box: The Piano/Info/Notes text box is for storing information about the piano. Manufacture, serial number, size, and so forth. Due to screen real estate, it is rather small. So, as of Pscale 360 Version 2.4 Decimal and 2.1 Metric we have added a larger text editing window below the data entry Grid. This lower window can also serve to remind users to include notes regarding the piano. The Edit button next to the upper Piano/Info/Notes text box jumps to the lower text window and the Return button below that returns to the top of the graph. The two text boxes are linked hand in hand. What is entered in one is also automatically entered in the other. This information is stored at the begining of your saved scale file as described elsewhere in the manual. We should also add that as of Versions 2.4D and 2.1M the Ctrl and Shift navagations keys are disabled while typing in either text box giving us normal control for Capital Letters and the characters like * and ". This also applies to the Paste File Data text box (Ctrl v for pasting) and the save File Name text box for Capital Letters in saved file names. Ctrl and Shift are not deactivated in the Grid but Note Types are automatically converted to UPPERCASE. As an experiment we copied and pasted 8 pargraphs of this Help Manual into Piano/Info/Notes and saved the scale file so there should be no worry about how much info you can add. The Wrap Constant input field: (Holds true for Wrap Values in the Grid as well - See Wrap above) This input field will usually be empty, for a value of .89 if the Bass String wrapping material is Copper. If the Bass String wrapping material is is Iron or Steel, the values can be I (Capital i) or .79 If the Bass String wrapping material is is Aluminum, the values can be A or .29 Dbl.Wrap Step Length mm. input field: The Dbl.Wrap Step Length is the length that the outer wrap extends beyond the the inner wrap on a double wound bass string. Looking at a double wound string the outside diameter "steps" down for a length of anywhere between 13mm and 21mm. A longer step length will result in higher Inharmonicity and a shorter step length lower Inharmonicity. Most 4' 11" to 5' 4" grands will probably want a 13mm. step length. Most String Makers will accommodate a request for a 13mm. step length. Setting the step length in this input box will set all the doublewound strings. However, you have to be clicked on a bass note to be able to globally set the the step length. Also, if the step length is blank it will default to 13mm. on Dbl.Wrapped strings. Some string winders do not like to go shorter than 15mm on the step length. Note: Autoscale sets all step length values to 13mm. The Pitch Input field: The Pitch input field is only included to display Pitch to alert the user if an imported Pscale file was previously pitch altered. Error Check Button: This is an important final check that will alert the user to possible Bass String Scaling issues. It is not a 100% perfect check (heck, what is). It checks for the following:
Error Chk - Wrap to Core Ratio: It has also been posited that, if possible, Single Wound Bass Strings should not exceed an Outside Diameter (ODWRAP) to Core (DIAM) ratio of 3:1. That is, ODWRAP/DIAM <= 3. In theory, overloading the string with wrap can diminish flexibility. Pscale has always considered this limit to be 3.5:1. Actually, AutoScale uses 3.3:1 These limits can now be set in Pscale Preferences. On short string scales you may have to push the limit to 5.5:1 (Dbl) or 3.5:1 (Single). We can also state, as fact, that there are many vintage "Name Brand" pianos with single wrapped bass strings having a wrap to core ratio as high a 4:1.
Error Check - Break %:
Error Check - DIAM-Up-Dn-Up: The one exception here is that when moving from TriChords to Bichords, it is fine to jump up/down core wire sizes. This is also true when moving from Bichords to UniChords. The Error Check now also checks for possible SPLM LSPLM errors. The Hidden Button: This Button gives the user extra info. In particular, Wrap to Core ratios, Dual Speaking Lengths in un-notched BiChord bass notes, and addl. information. The Typogram Button: (return to TOC) Note: Pscale calculated Break % (not to exceed 66% - 70%) is not the same as Paulello Calculated Stress %. The Pscale Break % calculation is based on the formulae of the late Dr. Albert Sanderson of Inventronics. The general rule of this calculation is not to exceed 66% though you will see pianos that push up to 70%. The Calculating Technician Dave Roberts calculation gives a slightly lower Break % calculation and not to exceed 60%. The Paulello Stress % calculation is not the same as you will see Paulello recommendations of Stress % in the 75% to 80% range in the top two octaves. The Typogram output is provided if one wants to experiment with the five types of steel piano wire manufactured and marketed by Stephen Paulello. He believes that "hybrid" scaling with varied hardnesses of piano wire can get all of your strings to a more optimum point of uniform stress or "elasticity". You can manually copy and paste each Pscale360 column of data into his Typogram spreadsheet and then manipulate his wire type for more uniform stress rates. We find this very interesting, educational, and worthy of serious consideration. More at: http://stephenpaulello.com/en/typogramme Don't forget to set the Typogram pitch to 440. It defaults to 442. BTW: As of Pscale 360 1.8 Decimal and 1.5 Metric the Paulello Typogram .xls spreadsheet should be installed in your Pscale 360 folder. In addition, the option to have Pscale calculate the Paulello wire Stress % for each type of wire, for each note, has been added for convenience. (Pscale American Version 1.7) This option is now the default printout with the option to display data for copy and paste into the Paulello Typogram if desired. The Pscale 360 calculated Paulello Stress % numbers vary slightly from the results obtained by copying and pasting into the Typogram spreadsheet. This is due American/Metric Conversions and other marginal factors (Pscale Tension Rounding and converting to Newtons). For most of the scale, the differences are only about 2/10ths to 3/10ths of one percent. However, it should be noted that the Pscale Paulello calculations in the 6th octave start to calculate lower by around 1% and in the 7th octave by around 2%. And at note 88 as much as 3%. This likely makes little difference on the overall picture but should be kept in mind. As for the high treble, we are not currently sure as to why the differences grow larger. However, we still consider these departures insignificant. It should be noted that some Paulello wire types do not have all of the standard sizes. Available sizes by Gauge are:
XM :13 through 21.5 It should also be noted that many American pianos use Gauges up to 27 (or higher) in the very low bass which are not available in Paulello wire. However, in most cases, these core wires will usually be reduced in size after rescaling. Finally, while on the subject, the Pscale Break % calculations (and the 66 % limit) as derived by the late Dr Albert Sanderson (Inventronics) is considered by some to be a little too conservative for todays steel piano wire. While Pscale uses 66% as an upper limit guideline, perhaps one could push this limit upwards as much as 5 percentage points. We currently do not have definitive answer for this debate. However, if you experiment with the Pscale Paulello output you will notice that the Paulello calculated Stress % for the Paulello wire types are all higher than the included Pscale Sanderson Break % calculation. Personally I surmise that the Sanderson Break % calculation may be conservative to also allow for possible metal fatigue over time. The Paulello Stress % is different than the Sanderson Break %. The 9', |, |, |, and <=7' Buttons: Tthe 9' and <=7' Buttons change the Inharmonicity Guidelines between <=7' (default) and 9' Concert Grand. The three | Buttons are other variations of Inharmonicity curves. Remamber, they are guidelines. If you hover your mouse over the buttons you will notice they are named curve1 through curve5 and you can assign curve# within the notes section at the bottom and it will automatically use the assigned Inharmonicity curve the next time the file is loaded.
The Ham/Str Contact Button: If the user is tracking
Hammer/String Contact Time, this Button will calculate Hammer/String Contact
Time. Of additional importance: This window also displays Uni, Bi, and
Tri Combined Tensions so the user can evaluate combined tension
jumps. Also, as of versions 2.4 Decimal and 2.1 Metric this report will
also display the ratio of the hammer strike distance and the speaking length.
1/8 is a good starting reference point but this often goes as high a 1/14 at
note 88. The ratio is often smaller as you get into the high treble. While slightly
off subject, the following advice from Ed McMorrow RPT can help establish optimum
strike lines in the Upper Treble The Compare Button: This is the connection to the Pscale File Compare option. It is recommended that one saves any current work session data before moving to File Compare. File Compare is most useful in demonstrating "before" and "after" scenarios on a particular rescale. However, it is also very useful if one re-caps bridges and wishes to "tweak" speaking lengths as the Text Out option will give one a printout of the + or - speaking length adjustments. Finally, the File Compare tool is interesting to compare speaking lengths of similar pianos made by different manufacturers. The +-CTBrk%:This Button will turn on/off The Calculating Technician calculation for Break % and it will appear below the Sanderson Break % calculation when you hover over a magenta Break % dot on the graph. This calculates as a lower value than Sanderson and is included for extra reference. The Bass Data Lines: It is best to change the bass note number by just clicking a dot on the graph. These input boxes were added before the grid data entry was implemented so you really do not need to use these. However, you can tweak a value here and it should be reflected in the grid and vice versa. They remain mostly as a quick reference. It is preferable that you enter bass string data using the grid. It is also preferable to edit and tweak scales buy going note by note, viewing the graph, using the + and - buttons or the pull down menus at the top of the graph. Inhamonicity, Tension, and Break % are calculated using formulae developed by the late Dr. Albert Sanderson known for his many contributions to the field of Piano Technology. Founder of Inventronics and developer of the Accu-Tuner, he also made many contributions regarding Aural Tuning and Temperaments. The Loudness / Sustain and Hammer Contact Time calculations are from formulae developed by Dave Roberts known for his 1979 - 1982 series of articles in the PTG Journal titled "The Calculating Technician". These 20 articles were later condensed into a single book of the same title in 1990 but is currently out of print. Note: For anyone who wishes to "roll their own" spreadsheet The entire 20 "Calculating Technician" articles are available on the PTG website starting monthly Sep 1979 through Apr 1981. All of the Roberts formulae will work fine though there was some controversy regarding the differences between Roberts and Sanderson methods when calculating Inharmonicity of bass strings (see Dec 1988 PTG Journal article Tuning Up by Rick Baldissin). However, we are looking for smoothness of Inharmonicity so it really matters little if the numbers are different.
Inharmonicity:
Tension: It should also be noted that the calculated tension (red dots) displayed on the graph is per string tension. This is why the Uni, Bi, And Tri guidelines step down. Actually the black tension guidelines step down in a ratio of 10:1, 8:1, and 7:1 ( 200/20 = 10, 160/20 = 8, 140/20 = 7 ) We believe that the 10:1, 8:1, 7:1 concept was also developed by Dr. Sanferson.
Break Point %: Loudness/Sustain: (often also referred to as Impedance or Z)
Positioned to the right of the main Pscale graph is the Loudness /Sustain
graph. The height of this graph auto adjusts to the number of notes that
contain data so it is not fully representational until looking at a complete
scale. Dave Roberts, author of The Calculating Technician", includes
this factor as worthy of consideration. In fact, he states to following
calculations in order of importance: Note: It is curious that smoothness of Tension is not mentioned in the above order of importance and we are sure that certain current scale designers place smoothness of tension as more important than Loudness/Sustaining Factor as presented in "The Calculating Technician". As for defining Loudness/Sustain Factor, we shall take the liberty of including the following quote from "The Calculating Technician": "The physical significance of this factor is that the larger it is (everything else being equal), the more quickly the vibratory energy in the unison is transferred to the soundboard, thus producing a louder but less sustaining tone." The opposite can be held for smaller numbers. The actual numeric value of each data point in this graph is not of much significance. It is the smoothness and/or large jumps in values that should be considered. There is one exception where the specific values may be considered. This is covered in Low Tenor/High Bass Bridge Considerations Note: The original Roberts "Calculating Technician" Loudness/Sustain formula yields rather large numbers with jumps in numbers like 1620 moving to 1438. Having consulted with other "calculating technicians" it has been found that taking the Roberts Loudness/Sustain number and dividing by 20 yields more meaningful and recognizable number. This will yield a corresponding jump of between 81 and 72. The graph looks the same but the numbers are easier to grasp. Pscale 360 uses the Roberts Loudness/Sustain calculation divided by 20. The SPLM Error and Smoothing Graph: This graph is the absolute best way to check if you have entered a Speaking Length Error. An error will either stick out like a sore thumb or, if not, probably will make little difference in the end scaling result. The option to Smooth the speaking lengths for optimum Tension and Inharmonicity has been added. By default, the Smooth button takes the starting notes of C88 and F33. I then calculates a "multiplier" based on the two speaking lengths. Then, it calculates the smoothest speaking lengths for all notes in between. The Report button will display a printable output of the speaking length differences. The Clear button will clear the current smoothing. The Insert button will insert the smoothed speaking lengths into the memory of the current working file. It is recommended to save any existing file before inserting the optimized speaking lengths to have a copy of the file before being smoothed.. Finally, this smoothing option is a helpful educational tool to demonstrate how an optimized bridge layout can optimize tension and inharmonicty.
As of Version 2.4 Decimal and 2.1 Metric, a BTRatio button has been added to quickly evaluate the Bass/Tenor break speaking length ratios in comparison with the their respective Loudness/Sustain ratios. This is discussed further in the Low Tenor/High Bass Bridge Considerations section of this manual. The Check BPHP Error Graph: This graph is the best way to check if your have measurement errors in the bass string "Tail Data" that you send to your string winder if you do not use string rubbings. This graph will not be to scale but will give you an approximate layout of the hitch pins in relationship to the speaking bridge pin on the bridge for each note. The key here is to print this graph and then compare it with the "stagger pattern" of your hitch pins and make sure that you did NOT reverse a BPHP1-BPHP 3 data entry. Remember, this is only a positional approximation. Note: It is most important that you save your input scale data to a file. I usually append the letter o (for original) to the end of a file name. Once saved, you can continue with AutoScale or reload the original scale if you want to start a new AutoScale. The AutoScale function in Pscale 360 is nearly identical to Legacy Pscale. However, the various Options have been reduced to a Tension Drop Down Menu and a single line Target Start,End Tensions input box. The AutoScale function will do most of your bass rescaling work but you will have to manually review and "touch up" or "tweak" the AutoScale results. You will want to click the Error Check button to view possible problems. You will also want to step downwards through each bass note from top bass note to bottom bass note to make sure that DIAM sizes and ODWRAP sizes gradually increase in size, The exception here is that when moving down from the lowest Bichord to the top Unichord, there can be a drop in core wire size. This is also not to say that a smaller core wire diameter could not exist on a lower note within a Bi or Uni section because I have seen it done by prominent Scale Designers. However, you may not want to risk confusing your String Winder. As a "Rule of Thumb", DIAM and ODWRAP sizes increase as you step downwards from top Bass Note to Bottom Bass Note. Multiple Autoscales on the same loaded file are not recommended. It is better to reload your saved original file to try different AutoScale Target Tension options.
The Autoscale Tension Drop Down menu defaults to the 10:1 8:1
7:1 Ratios. The 10:1 8:1 7:1 Target Tension option sets a straight line of
tension taking the average plain wire tension (7:1) and setting the BiChords
in a relationship of 8:1 and the Unichords 10:1. The yields fairly large
combined tension jumps between Uni and Bi bass string sections. The tension
guidelines are actually determined using the 10:1, 8:1, 7:1 ratios
relationships. This method will yield a Uni and Bi Tension Graph similar
to: To better understand the 10:1, 8:1, 7:1 ratios concept as developed by the late Dr Albert Sanderson of Inventronics, let us look at the lower tension guidelines of 200 lbs. (Uni), 160 lbs. (Bi), and 140 lbs. (Tri): 200/20=10, 160/20=8, and 140/20=7. 10:1, 8:1, 7:1 ratios The Most Even Tension option: This is the method that we had come to favor in recent years as it provides the smoothest combined tension jumps moving from UniChord to Bichord to TriChord notes. However, we are currently re-evaluating this as a favored method.
Remember, the graph points represent tension of only one string when
there might be two or three. So, a Uni, Bi, Tri spread that looks
like: The 3rd Average menu option just splits the difference between the high and low tension guidelines and produces a Tension Graph similar to Figure 1. Note: Over the past few decades, different schools of thought seem to have developed. One may favor uniform tension per Figure 2 which will give larger Loudness/Sustain jumps between Uni Bi and Tri sections. The others seem to pay more respect to the Loudness/Sustain factor at the expense of larger tension jumps between Uni, Bi, and Tri sections. Interestingly, a Figure 1 tension scenario will yield a much smoother Loudness/Sustain graph. Having reviewed "The Calculating Technician" recently, we are somewhat undecided pending further testing. Actually, we currently believe that either autoscale method will likely produce an improved string scale over the original. One common trend that we have observed over the years is for the lowest bass note 1 to start at lower tension and to trend upwards in tension towards the lowest bichord. We believe that this makes sense in that a higher tension note 1, with a short backstring length, will have a "clamping" effect on the freedom of movement of the bridge and soundboard. At the same time real estate at the low end of the bass bridge is often tight and the bridge closest to the rim. If using the 10:1 8:1 7:1 AutoScale method we would likely favor lowering to target tension of note 1 downwards to somewhere around 200 lbs. if there is short backstring length. That being said, this also provides an argument for minimal downbearing on the lowest bass notes. We'll even go so far as to say that there may be a good argument here for Baldwin style "AccuJust" hitchpins as well. Another reason for starting the lowest Unichords and Bichords at a lower tension is that we are less likely to push/excede the Wrap:Core ratio limits discussed elsewhere in this manual. Note: AutoScale automatically converts UniChord Singlewound (US) to UniChord Doublewound (UD) for all notes with less than 1260 mm. speaking length (SPLM). Synopsis of a Basic Re-Sscaling: (return to TOC) This synopsis will be based on the sampleo.txt scale file. 1] Make sure that you are absolutely comfortable opening, modifying, and saving some of the sample scales provided. We have heard too many times that users start right off entering data and getting stuck on the initial save process. 2] Use the lower Grid to bulk enter your scale data. 3] Establish the Note TYPE in the grid column by clicking the TYPE link at the top of the column. 4] Enter your data in the lower grid/spreadsheet area. Save to file a few times as you go. Heck, power outage?. 5] You can enter your tail data later. Or, if using a rubbing leave blank. 6] Once data is in the grid go back up and click the ReCalc button or press the F9 key. This should populate the graph. 7] Do a file save and name the file preferably with an o at the end for original: newfileo.txt 8] Do an AutoScale. For learning, just go with the default settings. We'll convert 29 and 30 to BiChords Later. 9] Click the Error Chk button. This will tell you where the AutoScale may have missed perfection. 10] We usually go to the top bass note and use the F1 to step down (or F2 key to step up) and make sure that the core DIAM gradually increases (can decrease when moving from bichords to unichords). If there is a lower core DIAM on a lower note we use the DIAM + and - buttons to adjust accordingly. We might lower the core on notes above or raise the core on notes below. 11] The other thing we need to watch on small pianos is the wrap:core ratio exceeding 5.5:1 on doublewound and 3.5:1 on singlewound. This is usually resolved by increasing core DIAM and thus raising inharmonicity. It is not uncommon on small grands (4' 10" - 5'+) for the inharmonicity curve to gradually rise above the inharmonicity guidelines in the lowest several notes.
12] Finally, in the case of the sampleo.txt scale file we will convert
notes 29 and 30 to bichord singlewound. Just click on note 29, pull down
the TYPE menu (top of page) and select BS. This will automatically insert .041 in DIAM
and .055 in ODWRAP. Then, increase ENDS to raise the inharmonicity. .055
is about the thinnest copper (.007) that should be used. Do the same for
note 30. You could even go down one core size and up the ENDs a bit more which
makes it a little easier for the string maker. Running Pscale360 Without Internet - Tablets/Smartphones: (return to TOC) This feature is very important to us! We should not pay for software that requires an internet connection to do our work. Pscale 360 on Desktops and Laptops (with any Operating System that we know of) are the recommended devices to use as mouse control displays "tool tips" when hovering over column headings or buttons. We can certainly see that tablets and smartphones might come in handy if demonstrating string scale issues to clients and ultimately, we want Pscale 360 to run on any device! Smart Phones and Tablets running IOs or Android present some additional challenges. We purchased a Samsung Galaxy Tablet several years ago that runs Pscale 360 fine, although a bit slowly. However, we purchased a new inexpensive Lenovo for testing with Android 12 and are currently having trouble running Pscale 360 installed in internal or micro SD storage. IOs versions of about 11.6 and above now include a file system in which you can unzip Pscale 360. You can also do this on Android devices to both internal and micro SD storage. The good news is that you can select, load, edit, and save anyfilename.txt scale files locally in storage. The bad news is that, unless you install a light weight HTTP server App on your device, it seems that you have to actually run Pscale 360 from an actual web site and then open and save your files to your local device. This does seem to work correctly on both platforms but saved scale files may likely end up in the download folder. We are working on understanding these issues better and will keep you posted on progress. We are confident that there is a way to run 360 completely locally without an internet web site. There is with a simple HTTP Server App.
To run Pscale 360 from a web site the URL is:
Pscale has been around for 34 years, Unfortunately the above website may not be here in another 30 years. Thus, the below solution may be a better way to go. As of 8/31/23 we have put together a "How To" document explaning how to add a free or inexpensive HTML server app on your tablet or smartphone. This way you can run Pscale360 "locally" on your device without having to go to an internet web site. The "How To" page is mobile.html
The fact that we have written Pscale 360 in "Browser Javascript" also allows us to not have to play the "Apple Developer Dance" @ 100.00 +++ per month and all kinds or restrictions worse than if you lived in a "Gated Community". Author comment on Smartphones and Tablets: Pscale360 on smartphones and tablets may be a definite benefit however we can't imagine doing an entire scale on a smartphone unless desperate. Furthermore, Pscale 360 is best using a Desktop or Laptop as having a mouse is very beneficial in that hovering over headings and buttons provides a "tool tip" description of the heading or button. A 7 to 10 inch tablet is completely manageable. We see the primary benefit here to be reviewing scales or perhaps showing results to clients and colleagues. A desktop computer or laptop will absolutely be the easiest, and best, working environment for Pscale360. Pscale 360 File Structure: (return to TOC) All Pscale 360 scale files are text files with a .txt file extension. The Pscale 360 file structure is simply one long string of text data. However at the begining of the file there is some extra information terminated with the ] character. The extra information is explained as follows: (delimited with ^ terminated with ]) Piano/Info/Notes^Default Wrap Constant(if present)^Default Exposed Core(if present) ]<- termination character ]. So, Do not use ^ or ] characters in the Piano/Info/Notes text box. Or, the scale file may not load correctly. Some words about printing: (return to TOC) Pscale 360 does not yet support the dedicated printing of the graphs. You just have to print the graphs as you normally would print any web page. Most browsers will print the Pscale 360 page(s) using the ^ P command. (Hold down the Ctrl key and press the P key). This also applies to the Print Data, Print Bass, and Typogram windows. Or, any other Pscale 360 windows. However, on newer computers, if you right click a graph, there may be a Take a Screenshot option. If this is the case, then clicking the option allows you to move the mouse to expand the size and clicking the Download option allows for saving as a .png image file. This option is available, at least, in the Firefox browser. If you wish to print dedicated graphs, you will need a 3rd party graphics program like Gimp (free) or Paint Shop Pro that has a screen capture tool. Or, you can also use the Print Screen key and paste the screen capture into an image program that may already come with your operating system. You would then crop the graph from the entire screen dump. With regard to printing scale data or bass info printouts, all will print correctly using ^p from the Pscale generated window. However, copy and paste will sometimes work correctly into an email, or not. You can almost always paste into MSWord or Libre Office but may have to set landscape mode for the bass printouts. You can also usually Select All, Copy, and Paste Special into spreadsheet programs. Important: On a new Pscale 360 Install, newer Browsers will initially block the Print Windows (and others) as Pop Ups. You must look for the Pop Up Alert Icon near the URL Address bar and Allow Pop Ups for your Pscale 360 program. Worst case, print and scan to a .pdf If you happen to be doing a piano that is the same size and manufacture as one of the sample scale files that come with Pscale 360 you can not assume that the speaking lengths are the same. You would probably be safe going by the plain wire speaking lengths (SPLM) but you would be well advised to carefully measure the bass and any tail lengths if not using a rubbing.
All Legacy Pscale Documentation is available as .RTF files at:
http://goptools.com/pscaleru.htm Length measurements in Pscale are taken in mm. Many Bass String suppliers will actually provide a special mm. tape measure that will hook onto hitchpins (or Bridge Pins). It is also helpful do do the following with a standard 10' or 12' Metric tape measure:
Fully extend the tape and lock the tape with the slider if present Removing the 90 degree tab makes it very easy to slide under the dampers and wedge right up to the Capo Bar or agraffe when measuring speaking lengths. The nail prevents the tape box from eating the tape if the locking slider goes loose. It is easiest to take measurements while the strings are still on the piano. If not, then you can jack up a block of wood against the Capo bar to act like the strings exist. Then measure from the Capo to the speaking bridge pin. The main length measurements are:
Speaking Length (SPLM) Speaking Bridge Pin to Agraffe, Capo, or ^ bar
in mm. (shortest length on dual/tri speaking length notes) Clarification: Technically, Speaking Bridge Pin to Hitchpin (BPHP) is measured to the Back of the Hitchpin though some manufacturers state to the Front of the Hitchpin. You will generally be safe measuring to the Front of the Hitchpin as the wire loops are generally larger that the pin and will elongate some over time. One could also measure to the Front of the Hitchpin and add about 2 mm. to split the difference. It would be a good idea to note on the Bass Report Measured to: Front, Middle, or Back of Hitchpin. Diameters of Wire: Plain/Core wire (DIAM) and Out Diameter of Wraps (DIWO) are measured in decimal. Alternate Method of Entering Bass Note Measurements: (return to TOC) Historically, we have always preferred to measure hitch pin to speaking bridge pin as well as the speaking length itself (SPLM). Some Technicians as well as Bass String Makers request measuring from the hitch pin to agraffe / VBar / upper speaking length termination point. This is fine a long as the bass string hitch pins line up well with their corresponding bridge pins and upper termination. In Pscale Version 1.8 Decimal and Version 1.5 Metric we have added a alternate method primarily to allow, and sort out, a hitch pin to agraffe / VBar / upper speaking length termination point measurement. As we were going to make this extra effort, it was decided to also accommodate the input of the traditional BPHP# and speaking length forms of data. So, initially, it might seem a little more confusing than it really is. Also, we did not want to entertain changing the Pscale file structure. In a nutshell, this method allow techs to measure Hitch to Speaking Bridge Pin (BPHP) and Hitch to Agraffe/VBar (HPtoA) for every bass string without even having to worry whether the bridge is notched or contains multi speaking lengths. Provided the data is entered correctly following the correct pattern, Pscale will parse the numbers and place them correctly into the the Pscale data grid. One still has to understand BPHP1 (closest to note 1), BPHP2, and BPHP3. The Record button now produces a data recording sheet tailored for these measurements.
The alternate method is invoked by entering the * (star) character in
BPHP1 field followed by the Enter key. Note TYPEs must be already defined in the TYPE column. The initial
template is in the form of: (HPtoA = Hitch Pin to Agraffe/VBar) Anomally: For consistancy, invoking the * for alternate data entry should always be followed by hitting the Enter key (not the Down Arrow) to initiate alternate data entry. Otherwise, cell focus may get confused with unpredictable results.
In all cases above input will be BPHP and either splm or HPtoA. One or the other within a command line. (examples below) In this format , with Dual/Tri speaking length notes, the longer speaking lengths (splm) actually go along with their corresponding BPHP# as longer speaking lengths are closer to note 1. Now, the / (forward slash) character tells Pscale how to seperate the strings and the , (comma) character seperates the data pieces for each string (BPHP, SPLM, HPtoA).
Data entry with Tri speaking length Trichords:
Data entry with Dual speaking length Brichords:
Data entry with Notched Bridge Trichords and Bichords of equal SPLM (+-
1mm):
Data entry with Unichords: The pattern must carefully be followed and the grid should be double checked even though you will see multi speaking lengths listed from shorter to longer, left to right. Most of the time you will likely use only one or two patterns. Or, just do it the way we have been before we had this new option. It should also be kept in mind that incorrect bridge notching can also lead to multi length splm in either direction. There is a sample scale file named 000tri.txt that we used while developing this new method (4' 11" Chickering). In it, the examples above are for notes 30 (trichord), 28 (bichord), and 10 (unichord). As of Pscale Version 2.2 Decimal and 1.9 Metric there is also an Excel spreadsheet named hitch2agraffe.xls in your Pscale install folder. This can be used to enter hitch to speaking bridge pin (mm) and hitch to agraffe (mm) and the speaking length is automatically calculated. One could then use this spreadsheet to copy SPLM and BPHP# data and import with the Grid Column Import Tool. However, it is critical that SPLM, LSPLM, and BPHP# data is correct. We want or strings to fit! Please double or triple check! Bass String Rubbings or Tape Measurements: (return to TOC) This is currently a bit controversial. For the past several years we have favored a good quality Bass String Rubbing because a good rubbing will not make a measurement error while it is fairly easy to make a measuring tape read error or data input error. Some String winders prefer measurements while others prefer rubbings. Most will accept either. With a rubbing, one merely has to provide a wire diameters data sheet and mark on the rubbing where you want your wrap windings to terminate. However, it is also a good idea to check that the offsets from the top of the hitch pins to the bass of the hitchpins is uniform throughout the bass notes and to note on the rubbing the actual hitchpin offset. Put a small square on the plate at front of hitch pin and measure from square to the top of the hitch pin. On some pianos, this can change throughout different sections of the Bass Hitchpins. If providing tape measurements it is critical that you double or triple check your measurements. Also keep in mind that un-notched bass bridges with BiChords contain two different speaking lengths. Some TriChords as well. String Rubbing Tip: It may be hard to find now but keep your eyes open for a roll of 8.5 inch thermal printing paper. Tape a piece securely over the agraffe area and the Bass hitch pin and bridge pin area. Take a piece of carbon paper (also getting harder to find) and gently rub over the agraffes paper. Then, do the same over the bridge and hitch pins paper. Then carefully measure the highest speaking bridge pin to the highest agraffe string point. Do the same with the lowest speaking bridge pin and lowest agraffe string point. Measuring to the front of the agraffe is fine. Now, lay your rubbings on the floor and orient them as closely as possible to represent the string string layout. Use painters masking tape to secure one of the rubbings to the floor. Then, position the other rubbing so that the highest and lowest measurements are exactly the same as the piano. Tack the 2nd rubbing down to the floor. Double check the measurements. Finally, cut some more off the thermal paper roll to "fill in" the rest of the rubbing securing with regular masking tape. Remove the temporary painters masking tape. Mark all hitch pins with the string number. Measure and mark the Hitch Pin offset. Measure and mark where you would like the winding to start/stop to represent the exposed core wire at each end. Addl. Note. It has been mentioned that an X measurement from the lowest bridge pin to the highest agraffe and the highest bridge pin to the lowest agraffe might increase accuracy. Some words regarding String Makers: (return to TOC) While it is great that we have tools like Pscale to be able to pick and choose wire diameters, we should keep in mind that seasoned Bass String Makers might make minor changes to your selected wire sizes for various reasons. The most obvious reason is that the string cannot be physically made because there is not copper winding small, or large, enough to actually make the requested string. However, there may be other, more subtle, reasons for minor changes. We should respect the string winders judgment in this regard. If there is a situation where you are experimenting and want the diameters as close as possible to requested spec you should inform the string maker that you are experimenting and to match as closely as possible. A Simpler Pscale360 and How Close is Close Enough: (return to TOC) We have tried to simplify Pscale 360 to contain all of the features of legacy Pscale while at the same time, make it easier to use and understand without numerous separate windows and nuances. Tension and Break % are now rounded and no longer calculate to 3 decimal points. Rounded is really close enough. The difference in size between American and Metric Steel Piano Wire is about .0005. In plain wire notes this difference might vary the per string tension +- 2 to 4 lbs. In a wrapped bass string, the difference is usually less than 1 lb. In both string types, Inharmonicity will vary a little as well. However, our overall goal is to smooth Inharmonicity and Tension and deal with any specific scaling anomalies.
Calc All Wraps has been removed. Many String Winders are likely to use either American or Metric copper and core wire. More importantly, a good string winder is going to know which sizes of their copper (American or Metric) are going to produce a target outside wrap diameter. Therefore, Calc All Wraps is not really necessary. Good string winding will usually produce strings within +- .001 of the target Outside Diameter. Occasionally, due to available copper sizes, the result might be +-.002. As a consequence, what you get is not going to match exactly the results of your Pscale graph. But, again, our overall goal is to smooth Inharmonicity and Tension and deal with any specific scaling anomalies. We should also mention that Sanderson, Roberts, Fletcher, and Miller Inharmonicity calculations are all going to give slightly different results for any given note. This does not really matter as we are looking at smoothness and anomalies. With the exception of isolated problem areas, an Inharmonicity, Tension, or Break % trend that is half a dot higher or lower makes little difference. Differences would be due to rounding of certain values or different source formulae. So, different string scale programs or spreadsheets will likely give different results. Again, calculated values that differ a little make little difference as we are looking for smootheness of values. For those compelled towards more accurate numbers, Pscale 360 files can be exported and then imported into Legacy Pscale(X) which calcs Tension and Break% to 3 decimal places and also plain/core to 4 decimal places. You can also load a scale, Autoscale, and then Calc all wraps if you wish to experiment and see how this affects your graph. Finally, we doubt anyone could ever hear or perceive any difference in +- .002 in a bass string or .0005 in a plain/core wire. Decimal and Metric: Wire and Gauge Differences: (return to TOC) If you, or your string maker, string with Metric Piano Wire (Roslau, Mapes Intl. Gold, Paulello...): Well, it turns out that there are two different methods regarding wire size Gauge determinations and we did not realize this until we added gauge sizes in the printouts as well as Paulello wire support. So, Pscale 360 American Decimal 1.8 must reconcile this to accommodate both methods. Both methods are valid and each have pros and cons. When we use metric wire in our decimal inch world, we find ourselves somewhere in the middle of two metric sizes of wire: ( Euro Gage 17 = .975 = .0384 | Round down = American gauge 16.5 | Round up = Euro gauge 17 ) Unified Euro/American Gauge Method (Table I below) (Referred to as (d)efault in the Pscale Printouts) For many years, Techs in the Americas, have been stringing with metric wire with the understanding that metric wire is slightly smaller than its Decimal Gauge equivalent for gauges 12 through 22.5. And, we just consider American and Metric gauges as the same by number though slightly different. At gauges 23 and up, Metric and American gauges are essentially the same (+- .0001) anyway. Version 1.7 of Pscale Decimal added a checkbox so that we can quickly see the actual difference in Tension, Inharmonicity, and Break % calculations. The differences are slight but metric wire of the same Gauge number will lower per string tension by about 4 to 6 lbs. per string. This can lower total tension of a 41000 lbs. scale by up to about 1000 lbs. So, the differences are relevant. After much hair pulling, we decided to add an Up checkbox to the right of the existing Use Metric Plain/Core Wire DIAM checkbox to quickly be able to go Up and see the actual difference in Tension, Inharmonicity, and Break % calculations. When you use this method in the Print Data printout, and choose the (d)efault option, the new Up checkbox is automatically unchecked (if checked) due to using thinner wire. At the same time, if you use the (a)lternate gauge method option described below and the Use Metric left box is checked, it will be automatically be unchecked because you are going up in wire size. Using the Metric checkboxes with the Print Data button will give you accurate calculated numbers for the metric wire differences. Alternate Dual Gauge Method (Table II below) (Referred to as (a)lternate in the Pscale Printouts) Also, for many years, some Techs around the world have used a different method when dealing with decimal inch diameters. Starting at Euro/German gauge 12 at 0.725mm which calculates to .0285 inches, they just drop the 4th decimal place (or round down) to .028. This in turn creates a different American gauge 1/2 size lower @ 11.5. This applies to Euro gauges 12 through 22.5. In essence, this method changes our American Gauge 12 to Euro Gauge 12.5 on gauges 12 through 22.5 and drops .050 entirely. However, Paulello does list a gauge size of 22.75 or 22 3/4. So, that's a new one. The two metric wire string winders that we talk with most use this Alternate method. That being said, per string tension on bass strings is hardly affected because the Wrap OD (DIWO) has the most influence on tension. Break % will move a point or two. Using this method, the actual metric wire is thicker and the actual tension will be 4 to 6 lbs higher per string. And, this method may require thinking in two gauge numbers different by 1/2 size.When you choose this method in the Print Data printout, the Use Metric Wire checkbox is automatically unchecked (if checked) due to using thicker wire. It is true, that by using this method, gauges 15 - 22.5 are between .0001 and .0003 closer from the halfway point to the higher metric gauge number. To further confuse matters, we read recently in a Supply House catalog the Roslau tolerances are within +- .0003. This begs the question as to: " Just how much difference does this all make?" So, which way? If you happen to string with Mapes American Decimal wire (not Intl. Gold) you are good to go as is. If you string with metric wire you will have to decide which method to use if you don't already think in one method or the other. With plain wire, your main considerations are with which way you want to go with the tension. The difference in these methods are probably important for your favorite bass string maker but the Bass Printouts list diameters and gauge numbers and also state gauge determination method used. So, let the string winder decide. The differences in gauge methods are probably more important to the Paulello wire support with both plain wire and bass strings. The Unified Gauge Method will use slightly thinner metric wire and result in slightly higher Break % and Paulello Stress%. The Alternate Gauge Method will use slightly thicker metric wire and result in slightly lower Break % and Paulello Stress%. Pscale prefers to use Table I below. Mostly, because we have thought this way for decades. This is also why the Use Metric Core Wire checkboxes are included to quickly see the differences of both methods. Note: On a 30 note bass in the decimal inch world (sam410o.txt), using the Bump button and bumping up one gauge size (.001) on plain wire notes 31 - 88 will result in a total plain wire tension increase of about 1600 lbs. Because decimal inch wire is about halfway between metric wire sizes, using a metric gauge 1/2 size larger or smaller will affect total plain wire plus or minus 800 lbs. respectively. You will also notice that plain wire Break % is not affected when checking/unchecking the Use Metric Core Wire checkboxes. Wound string Break % will change as smaller core equates to an additional winding material load. Again, this only became a problem for us when we decided to include Gauge numbers in the Data/Bass/Paulello printouts. Thus, we are forced to ask in the program which way the user would like to treat gauge numbers. Again, interesting to note that sizes .051 and higher are essentially the same as their metric counterparts with either method.
The Use Metric Core Wire Checkboxes below the Loudness/Sustain Graph are useful and remain in effect during the Scale Data printout with regard to Tension, Inharmonicity, and Break %. However, one or the other are turned off depending on which method is used. Pscale 360 also has an almost fully Metric version but it does not have quite as many features as Pscale 360 Decimal. It has not had quite as much field testing and is still considered "Beta". Actually, Pscale has had a metric version since the earliest MSDos versions. Pscale 360 Metric has always converted the included sample scale files which are in American decimal format upon opening the file. Because of the slight differences in diameters up to gauge 22.5, there is always a slight difference in the calculations. Pscale American Decimal Version 1.8 can now open files saved in metric format but there will be a slight difference for the same reasons stated in the previous paragraph. When saving files using either the Pscale 360 American Decimal or 360 Metric it might still be good practice to indicate in the filename which format in which the file has been saved. Perhaps including an _d or _m in the filename. This is not necessary but worthy of consideration. Finally, realizing that there are two different gauge methods has completely tested our sanity and pushed it to the limits. The differences are minor and the entire above explanations may seem confusing. Perhaps, if you use metric wire, it can simply be boiled down to: (d)efault = Think down - Euro/American wire gauges are the same and plain /core wire (smaller) tension is slightly lower. (a)lternate = Think up - Euro gauges are 1/2 size larger than American and plain wire (thicker) tension is slightly higher. Pscale Setup Files: (return to TOC)
If you have not done this already, you should go into you browser settings/options and find where you set your Browser to "Ask me where to save downloads". Do this or your scale files and the setup file will be transparently saved to your downloads folder and the setup file will not work. As of versions 2.0 (Deciamal) and 1.7 (Metric) we have added a new setup file that will supersede the previous 360(m)setup.js files. They are: (note: you may have to re-edit any current preferences.)
Version 2.0 Decimal: 360nsetup.psf (pscale setup file - new setup) We have also added a utility to edit this file within the Pscale 360 main page. Your will now see an Edit Pscale 360 Preferences button at the top and bottom of the grid/spreadsheet data entry area. The first time you edit preferences you will likely have to navigate to your pscale360 folder. You also have to make sure that the 360(m)nsetup.psf is saved in your pscale360 folder. The most important thing to know here is that you select the correct .psf (not a .js) file and that once you select the file, you have to click the Load Selected File button. Several of the preferences are for saving keystrokes or windows but you can now enable/disable the following key behaviors:
Ctrl key to step down a note and Shift key to step up a note (enabled by default) The above files can also be edited manually with Windows Notepad or Mac TextEdit but be sure to save as type text and with the .psf extension. One irritating thing about modern operating systems is that they often do not show filename extensions: .psf .txt .html .exe and so on. This is not helpful! To show file extensions in Windows: click Start, Windows System, File Explorer, View, and check the box next to File name extensions. To show file extensions on a Mac: Open File Finder, preferences, advanced, and select Show all file name extensions. As of Pscale 360 Version 2.6 Decimal and 2.3 Metric, we have finally figured out how to make Loading and Saving Files a one step process for both Loading and Saving. This is due to some advances in Javascript as well as some programming progress on our part. The following is recommended for regular users who have set their Browsers to "Ask me where to save downloads". And, who wish to save some mouse clicks loading and saving files. You can edit your 360nsetup.psf (decimal) or 360mnsetup.psf (Metric) with a plain text editor or using the Edit Pscale Preferences button above the Grid and set the following variables as follows:
skipsavehelp = true; You have to make sure that the setup file is saved in your active Pscale 360 folder and restart Pscale 360. This will automatically load and plot a scale file without having to click the Load Button as well as going directly to the Save file window where you can adjust the filename and save the file. We have tried several times over past years to accomplish this and have finally done it. Better late than never. Finally, if you ignore these files, each version of 360 will have all its features but possibly require a few extra keystrokes or mouse clicks.
Importing/Exporting Scale Data From/To other sources: (return to TOC) Importing: While long overdue, Pscale 360 v 2.2 Decimal and v 1.9 Metric now allow data to be inserted into the Grid columns using the Grid Column Import Tool. The button is located at the top and bottom of the data Grid. You can now use the Copy and Paste function to copy a column in a spreadsheet and then paste the data into the columns of the Pscale Grid. Some spreadsheets start with note 1 and progress upwards. Some start with note 88 and progress downwards. The Grid Column Import Tool will handle either direction but you will have to make note of the start note and end note. BTW: Legacy Pscale(X) scale files (1990 - 2013) are standard .dbf (DbaseIII) files that can be opened by most versions of Excel using the File, Open, As File Type option. Office 365 Excel may require a Google search for help.
The Grid Column Import Tool accepts the following data formats: There is now also a practice spreadsheet file named idata.xls to see how the Grid Column Import Tool works. Exporting: The Print Data button has a "by column" option to easily copy Pscale data to other spreadsheets. The Print Bass button does not have the "by column" option but most spreadsheets have a Paste Special option that should place the data in a format to then copy and paste to other spreadsheets. It may take some experimenting but Paste Special in spreadsheets like Excel, Libre Office, and Open Office will enable you to export Pscale 360 output for printing into usable spreasheet format using copy and paste. Pscale Speaking Length Compare Utility: (return to TOC) This utility has been added to the Pscale 360 version 1.9 and Metric version 1.6 updates. There is a new button to the right of the File Info ? marked as < > If a file has been opened and loaded and you click the < > button a Window will open with: Filename | G7 | G6 | G5 | G4 | G3 | G2 | G1 steinlo.txt | 61 | 123 | 233 | 441 | 852 | 990 | 1244 (this text will be highlighted) Do a Ctrl C (Windows) or Cmd C (Mac) and copy the data to you clipboard memory. The data is the filename and speaking lengths of all G notes in the scale (G7 - G1) Click the OK button and The Speaking Length Compare program will open an a new browser tab. Paste in the data (previously copied) from you clipboard using Ctrl V (Windows) or Cmd V (Mac) into the top Text Box. Then click the Browse or Choose File button, navigate to your Pscale 360 folder and enter *.txt in the file name text box to list only *.txt scale files. If you have converted Legacy Pscale files to .360 you can use the *.360 file mask. Select all of the files listed by clicking the first file once to highlight, holding down the shift key, and clicking the last file. This should highlight all of the files. Then click the Open button. The file will be scanned and a message will appear to click the View Results button. By default, the compare program will pull files that are similar to within + - 10mm. of speaking length for G7 through G3. If you are looking for the same Mfg or Model use the Include G2 and G1 option. Below is an example of including the G2 and G1 option. You will notice that steinlo.txt and STL2537.txt vary by 4 mm. on G4, 7 mm. on G2 and 4 mm. on G1. They are both Steinway Model L. The ST157722.txt file is currently unknown but a Steinway. Probably a Model O. Could be an L. Speaking Length Comparison Report G7 - G1:
What's still Missing in the Metric Version: (return to TOC)
The Pscale 360 Metric version has nearly caught up with the Pscale 360
American Decimal version with regard to features. Here is what is still
missing: Practical Scaling Cause and Effects - What if's: (return to TOC) As a general rule, the following behaviors occur: (All else staying the same) Plain Wire If we decrease diameter, Tension and Inharmonicity go down. Break % stays the same. If we increase diameter, Tension and Inharmonicity go up. Break % stays the same. If we decrease speaking length, Tension goes down, Inharmonicity goes up, and Break % goes down. If we increase speaking length, Tension goes up, Inharmonicity grows down, and Break % goes up. Bass Strings If we decrease core diameter, Inharmonicity goes down. Break % goes up, Tension stays the same. If we increase core diameter, Inharmonicity goes up. Break % goes down, Tension stays the same. If we decrease outside diameter, Inharmonicity goes up. Break % goes down, Tension goes down. If we increase outside diameter, Inharmonicity goes down. Break % goes up, Tension goes up. If we decrease speaking length, Tension goes down, Inharmonicity goes up, and Break % goes down. If we increase speaking length, Tension goes up, Inharmonicity goes down, and Break % goes up. Low Tenor Plain Wire to Bass Note Conversions: (return to TOC) One of the most common areas for a string scale weakness is in the lowest plain wire notes on many pianos. In these situations we will see some notes where the Tension is below the lower tension guideline and the Inharmonicity is above the upper Inharmonicity guideline. The only good way to fix this is to convert these problem notes to Bichord Bass notes. When changing from plain wire to bichord bass (TP to BS) it is best go to desired note and use the top Note TYPE pulldown menu. Low Tenor/High Bass Bridge Considerations: (return to TOC) The Low Tenor to High Bass changeover is most often an area of a piano where string scale anomalies exist. Most of these can be corrected, or improved, by manipulating tension and inharmonicity. In most cases, the main problem is under tensioned plain wires with high inharmonicity for the bottom 2 to 6 plain wire notes as mentioned above. While some improvement in tone will likely result by using some Paulello TYPE 1 or 0 wire, this will not increase the tension or lower the Inharmonicity to any significant degree. So, a BiChord Bass Note conversion is usually the only real remedy for raising Tension and lowering Inharmonicity. Somehow during the twentieth century Bass Strings got a bad rap! Aside from the problem of miss matched Bichords or Trichords that cause unison tuning problems, Bass Strings are great as we have significant control for adjusting Tension and Inharmonicity. There is nothing bad about Bass Strings if the unisons tune correctly! Personally, one of my favorite scales if the vintage Mason & Hamlin Model AA which has a 20 note bass bridge and 9 additional bass notes on an intermediate bridge starting with 2 bichords and then 7 trichords. I owned a 1906 and it really had the magic. However, I hate trichord bass notes but tolerated them on this particular piano. Personally, I would always consider replacing trichords with bichords but would want to look closely at possible Hammer Contact Time implications. Trichords increase the likelyhood of miss matched unisions (for tuning) by having that 3rd string in the mix. The late Dr. Albert Sanderson thought the 3 bridge Steinway Model A was one of Steinways best string scales but I would gladly lose the trichord bass notes on that intermediate bridge as well. It appears to have the same configuration as the MHAA. 2 Bi's and 7 Tri's on the intermediate bridge. The speakings lengths of both models are nearly the same. Hmmm... Note: Dr. Sanderson rescaled several models of Young Chang grands in the later 1980s. If you happen upon one of these like a G-150 you will notice that the exposed cores at the agraffes increase in length as they approach the plain wires to bring up the Inharmonicity to be closer to that of the plain wires. This tells you that it is a Sanderson scale. You can be sure that the scaling is good but unfortunately, too many of these have miss matched bichords (unison tuning) that detract from the scaling improvements. In fact I just tuned one of these yesterday and the bichord matching throughout the bass was worse than average. Unfortunate to have improvements negated like this. There is an additional factor that some "Calculating Technicians" take into consideration. This usually only arises when one is converting plain wires to bichord bass notes or making adjustments to the bridge speaking lengths. Often, the lowest tenor bridge speaking length is usually significantly longer than the highest bass bridge note. If the lowest tenor speaking length is, say, a certain % longer than the highest bass bridge note, then one might seek a Loudness/Sustain (impedance or Z) value for the top bass bridge note that is the same % higher than the Loudness/Sustain (impedance or Z) value of the bottom tenor bridge note. X/Y = Y/X (or Y/X = X/Y) The sample1087.txt rescaled Chickering 4' 11" is a good example of this: The lowest tenor bridge note is 29 with a speaking length of 946 mm and a Loudness/Sustain (impedance or Z) value of 58 The highest bass bridge note is 28 with a speaking length of 792 mm and a Loudness/Sustain (impedance or Z) value of 69 So, we get something like x/y = y/x or 946/792 = n/58 946/792 = 1.1944444
1.1944444 * 58 = 69.277775 which is close enough to 946/792 = 69/58
You can also run the nubers the other way: These results yield an inverse relationship between speaking length jump and Loudness/Sustain (impedance or Z) jump. In my opinion, trying to match these numbers this way is still somewhat theoretical. However, I did the bichord conversion on the above Chickering 4' 11" in the late 90's and was not told about the above possible inverse relationships until around 2020. It is somewaht coincidental that the numbers work out so closely. Currently these relationships need further study and evaluation. Remember, I'm mostly just the messenger. The added BTRatio Button above the Speaking Length graph now allows a quick look at how these ratios work out for any given scale being evaluated. Some words regarding Hammer Contact Time: (return to TOC) Pscale has always supported Hammer Contact Time as discussed in "The Calculation Technician" by Dave Roberts. This calculation is just the combined tension of the strings in a note divided by the distance from the agraffe to the point where the hammer strikes the string. It just give a number that you can compare with and adjacent note and the most logical comparison is the highest bass bridge note and the lowest long bridge note. We have never placed much importance to this comparison as we believe Tension, Inharmonicity, Break % and Loudness/Sustain rank higher in importance. And, different technicians rank order of importance slightly differently. That being said, Hammer Contact is based on combined Unison tension. However, the Hammer Contact Time does have some relevance so it may be interesting to measure the Bass Tenor break or transitions from Unichords to Bichords to Trichords. We do think that Hammer Contact Time is the culprit behind Trichord bass notes. Ug... The sample file steingdo.txt has some ATSD numbers at the trichord bass to plain wire changeover. The Calculating Technician is seeking smoothness across these transitions. We do believe that one can usually use Bichords and up the tension so as the combined tension is close to that of the combined tension of the Trichords if Break % allows. Finally, Hammer Contact Time is also adjustable with different voicing methods. And, we currently need to research Hammer Contact Time more. Some more words regarding Break% (return to TOC) The Sanderson Break % calculation has worked fine for more than 30 years. As mentioned, some feel that it is a bit conservative and if you look at the Steinway S sample file (steinso.txt) you will see that note 88 has a Break % of 78%. And, a 56mm speaking length is too long for note 88. As of Pscale 360 version 2.5 Decimal and 2.2 Metric we have added the option of viewing the Roberts Break % in addition to the Sanderson calculation. This is done by clicking the +-Brk% button to the right of the Downbearing button. Adding the Roberts calculation is done to give the user more information in situations where Sanderson Break % seems high. In general, the Roberts calculation results in a lower Break %. Now, this question arises from time to time: "Why doesn't Break % change when you increase wire diameter and tension goes up?". Basic logic would seem that is should but it does NOT. Increase the speaking length and Break % will go up. Break % results are dependant on speaking length and frequency. We are mostly messengers here with Pscale 360 and it is beyond our scope to to get too deep into the weeds. We can also define Break % as follows: The amount of tension on a given piano wire that is considered safe in that the wire remains in a state of elasticity (elastic domain) but does not enter a state of deformation (plastic deformation domain). This elastic domain should not be confused with Young�s Modulus of Elasticity. (from Jean Louchet "The Keyboard Stringing Guide") Converting Legacy Pscale Files to Pscale 360: (return to TOC) As of 9/7/21 there is a new FM.OVR file on the download page. If you save this updated file to your legacy Pscale folder:
C:\pscale (Legacy Pscale Users) There will be a new button to convert all legacy Pscale scale files to the Pscale 360 format in one shot. It copies the files and adds a .360 file extension. If you can't see the file extensions there is a way to change the folder properties to show file extensions F-ing Windows! Google "change windows file extension view". Below is the older procedure: If you are running a "legacy" version of Pscale you will be running either regular Pscale for Win on a 32 bit system or PscaleX which is the +- 2008 "work around" because we knew Microsoft was going to stop 16 bit program support. The PscaleX platform starts with a black and white screen (no mouse) and one starts Pscale for Win within the DosBox virtual environment. If you are running either of the above versions you may need to update one file (fm.ovr) from our download page.
While running Pscale for Win or PscaleX, pull down File and then click
Open If you don't see the "Create a Pscale 360 File" button then you need to go to our Pscale download page and save the file fm.ovr to your working Pscale folder/directory. If running regular Pscale for Win, your working directory is most likely: c:\pscale If running PscaleX, your working directory is most likely c:\pscalex\pscale Assuming that you have the "Create a Pscale 360 File" Button: Pull down File then click Open and click to highlite the desired file for export. Then click the .Txt Out/In Button over on the far right. Then click the Create a Pscale 360 File button. If running regular Pscale for Win, the "Create a Pscale 360 File" Button will just run notepad and open a window of data in Pscale 360 format. You can just Save As and save this file as filename.txt in your Pscale 360 directory. (most likely c:\pscale360) If running PscaleX, you are going to have to save the generated Pscale 360 data to a file using Save As to a filename.txt file (warning there may be other .txt files) or use the default filename.360 and then move and rename the file(s) as filename.txt In Pscale X you are going to have to exit PscaleX (or use the Windows key) and go find the saved file in c:\pscalex\pscale directory. Then copy to your pscale360 folder/directory. After doing a few test runs, there is no reason to not just convert several files at once and then move over to your pscale 360 folder/directory. We have always wanted write a program that would convert all legacy files in one shot but just have not managed to do this yet. Possible Display Issues: (return to TOC)
Up until Pscale 360 1.8 and Pscale 360 1.5 Metric we had the basic Table
widths set at either 960 or 1000 pixels wide. In some browsers this may have
contributed some lines wrapping buttons around to the next line. This can
usually be remedied by using the browser Zoom settings and zooming in or
out. Ideally, we want buttons, text, input boxes to fall on one line in a
logical manner. We have increased the table width settings to 1024 in both
versions. If zoom does not work and you always use the same desktop or laptop,
you can also edit the 360(m).html file Program Anomalies / Odd Behavior Issues: (return to TOC) When Pscale 360 was first created it started with a Top Line Menu for entering Data using either a text box for SPLM or Pull Down Menus for DIAM, ODWRAP and other data items. Almost immediately, it was decided that a data entry Grid, in column format, was an absolute must for ease of data entry. Synchronizing the Grid with the Top Menu has been an ongoing process since 2013 and we just about have it bullet proof. However, there is still at least one outstanding odd behavior: Versions 2.3 Decimal and 2.0 Metric introduced routines that trigger setting the NOTE TYPE(s) when starting to enter scale data by stepping down a note or entering a SPLM for note 88. We figured that it would be easier for new and occasional users to get the NOTE TYPE taken care of immediately as any calculations require a NOTE TYPE (TP, TS, BS, US, and UD). The Set NOTE TYPE routine is not triggered when loading existing files. When the set Note TYPE routine is triggered it inserts sample data for Note 88 in the Top Line Data items: TP 51 .030 and the same information for Note 88 of the Grid . Now, if you go down to the Grid and chane SPLM from 51 to 50 and DIAM to .029 and then scroll back to the top line menu the data change has not been updated. However, 50 and .029 are in memory which is the most important. Looking at the Top Line Data items, if you step down a note and then back up a note the correct 50 and .029 are displayed. Bottom Line: The top line data items are not always updated until one moves down or up a note. We're getting there and will eventually get this 100%. Well, you would think so after 10 years... Maybe the next update. As a general rule of best practice one would do the data entry in the grid (it's faster), update the graph by clicking ReCalc or pressing F9, and then tweak the scale using the Top Line Data menu. The Top Data Menu will always reflect the data in memory when moving to a new note. We are sure that there are probably other odd behaviors, some of which may have been mentioned elsewhere in this manual. However, please let us know if you see anything questionable. Finally, if you look at the Update Changes below, it is a quick way to refresh you memory of the many program enhancements made since 2013.
Pscale 360 Update Changes
Log: (return to
TOC)
Pscale 360nsetup.psf example (return to TOC)
Note: This text file can be edited from within Pscale 360 or by using a straight text editor (no formatting)
// Note: // and /*....... */ are javascript comments and ignored by javascript var gaugemethod = "d";
///// If you consider Euro wire gauges to be 1/2 size larger than American (slightly larger wire) and /*============================================================================================*/
///// When you print Bass Reports your choices are m d or a (m)etric or (d)ecimal or (a)lternate format var leninfo = "m";
///// Set the above value to the letter or letter- combination of your choice /*============================================================================================*/
///// If you would like to ad your Name and Phone/email to the Data and Bass printouts var addprintinfo = ""; /*============================================================================================*/
///// It is common on low tenor bichords to increase the length of exposed core (ends) to raise var changetenorends = true;
///// If the above is set to false; you will not see the option for unbalanced bichords
/*============================================================================================*/ var skipsavehelp = false;
///// Set the above variable to true; if you are comfortable saving files on a laptop or desktop /*============================================================================================*/
///// If you always use Pscale 360 on a laptop or desktop you can set the below variable to true; var skipmobilesavewindow = true;
/////This is now set to true by default as most hand held devices now support the HTML5 file /*============================================================================================*/
///// Pscale 360 has alway required clicking the Load button after selecting a scale file. var autoloadfile = true;
///// One can still paste scale file data from .txt scale file into the Paste File Data box and /*============================================================================================*/
///// Pscale 360 has always required clicking the left hand Save button and then the right hand Save5 var autosavefile = false;
///// We should remind users to go into their Browser settings and find the switch to /*============================================================================================*/
///// When you use Pscale 360 on a tablet of Smartphone you can set the below variable to true; var skipmobiledetectwindow = false;
///// /*============================================================================================*/
///// This variable, when false, tells Pscale to have you establish all note types as soon as you var setnotetypes = false;
///// In Pscale distributions this is set as false so that new and fair weather users will not /*============================================================================================*/
///// Set the below variable to true if you want the Ctrl key to step down a note and the var usectrlshiftdnup = false;
///// /*============================================================================================*/
///// Set the below variable to true if you want the F1 key to step down a note and the var usef1f2dnup = true;
///// /*============================================================================================*/
///// AutoScale stops scaling a string if the single or double wound wrap:core ratio exceeds the numeric
var maxdratio = 5.4; // double wound max wrap:core ratio
///// /*============================================================================================*/
///// Set this var showccten = false; if you do not want to graph the combined unison tensions var showccten = true;
///// /*============================================================================================*/
///// Set the var showctbreak = true; if you always want a Roberts Calculating Technician Break % var showctbreak = false;
///// /*============================================================================================*/ [CURRENT END OF HELP]
|
||||||||||||||||||||||||||||||||||||||||||||||||||||||||||||||||||||||||||||||||||||||||||||||||||||||||||||||||||||||||||||||||||||||||||||||||||||||||||||||||||||||||||||||||||||||||||||||||||||||||||||||||||||||||||||||||||||||||||||||||||||||||||||||||||||||||||||||||||||||||||||||||||||||||||||||||||||||||||||||||||||||||||||||||||||||||||||||||||||||||||||||||||||||||||||||||||||||||||||||||||||||||||||||||||||||||||||||||||


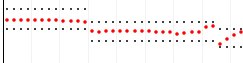 Figure 1 (except
top 2 bichords - low tenor bichord changeover)
Figure 1 (except
top 2 bichords - low tenor bichord changeover)
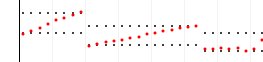 Figure
2
Figure
2